Learn How to Make a Successful Water Leak Insurance Claim effectively. Assess the damage, understand your policy, document thoroughly, and promptly report the issue to your insurer. Mitigate further damage and communicate honestly. Quick action and proper documentation increase your chances of a successful claim.
Introduction:How to Make a Successful Water Leak Insurance Claim
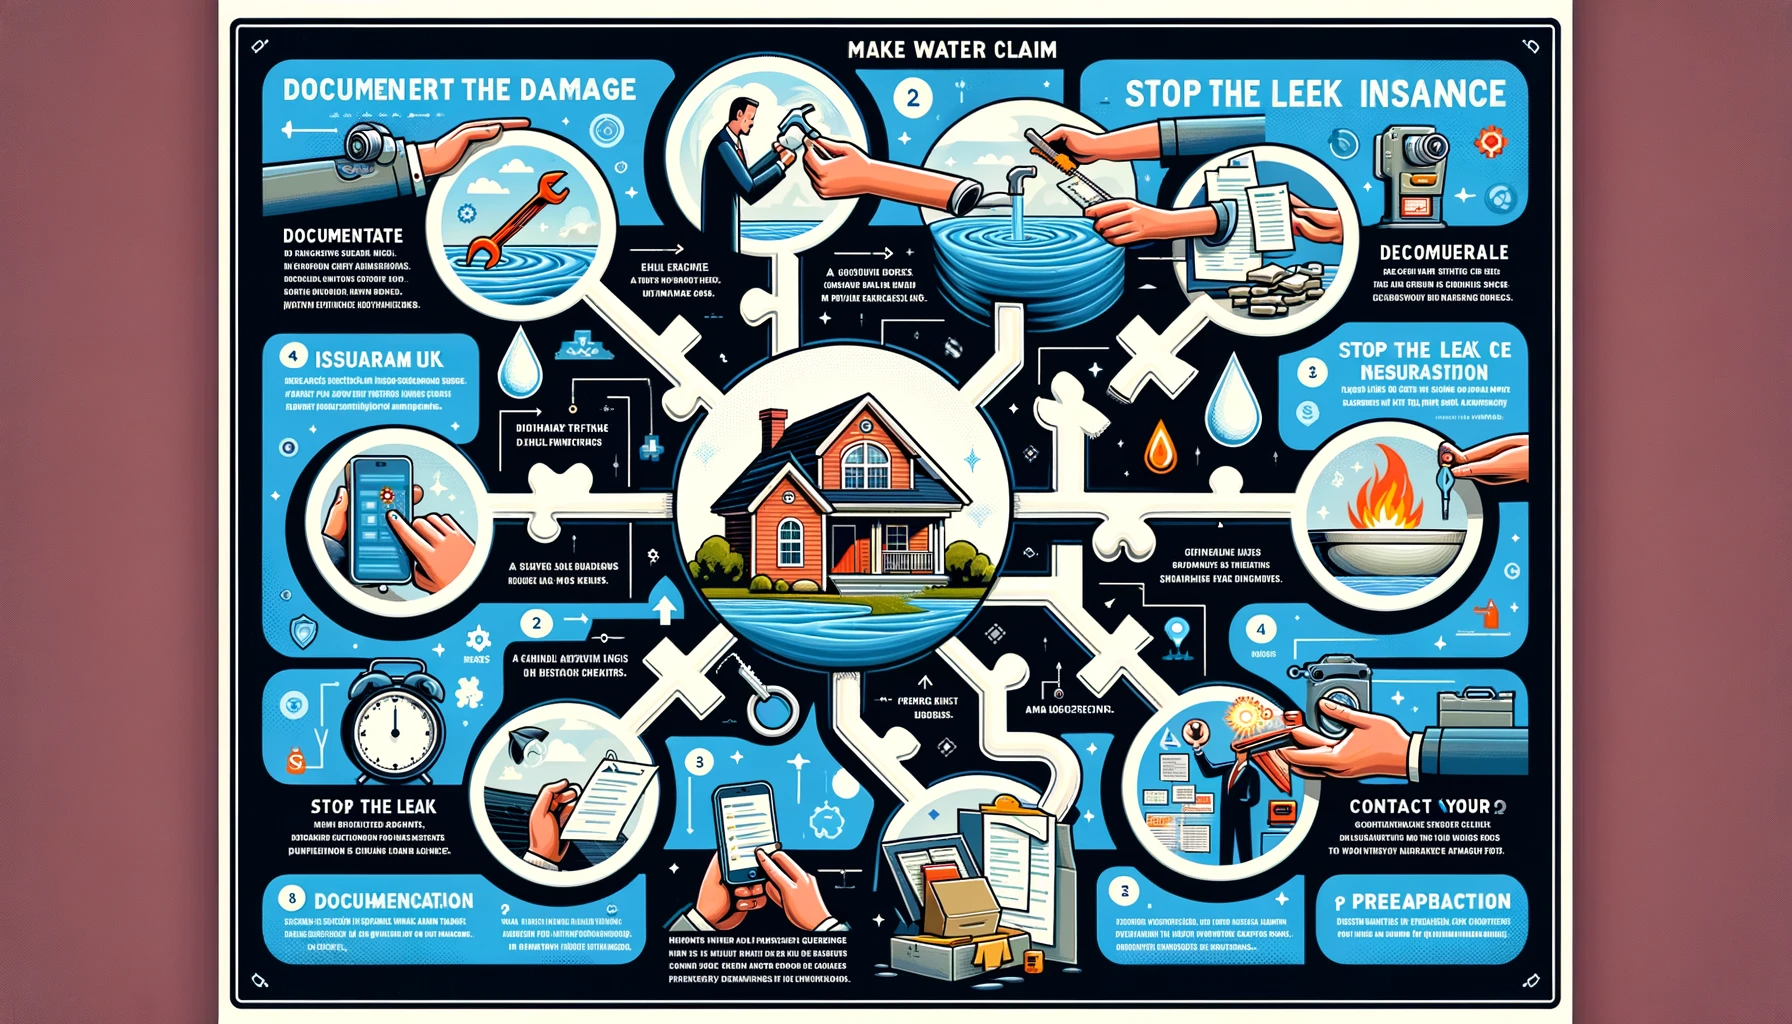
Let’s delve into how to make a successful water leak insurance claim. Water damage can be quite tricky to navigate, but following the right steps can set you up for a successful claim. Here’s a comprehensive guide:
- Assess the Damage and Document It:
- As soon as you discover water damage, assess the extent of the harm. Take clear photos or videos of the affected areas. Proper documentation is crucial for your claim.
- Identify the source of the leak. Was it a burst pipe, a faulty appliance, or another cause? Knowing this will help you communicate effectively with your insurer.
- Understand Your Insurance Policy:
- Review your homeowner’s insurance policy carefully. Understand what types of water damage are covered and what exclusions exist.
- Keep in mind that flooding is never covered under a standard home insurance policy. To be protected against flood-related damage, you’ll need a separate flood insurance policy.
- Contact Your Insurance Company Promptly:
- Report the water leak to your insurer as soon as possible. Provide all necessary details, including the cause of the leak and the extent of the damage.
- Be prepared to answer questions about the incident. Honesty and accuracy are essential.
- Limit Further Damage:
- Take immediate steps to prevent further damage. For example:
- Shut off the water supply if the leak is ongoing.
- Remove valuables from affected areas.
- Arrange for temporary repairs (if necessary) to prevent additional harm.
- Keep all receipts related to these emergency measures.
- Take immediate steps to prevent further damage. For example:
Remember, quick action and proper documentation are key to a successful how to make a successful water leak insurance claim. Denied claims can impact your coverage and potentially lead to higher premium rates. Stay informed, communicate promptly, and protect your home effectively! 🏠💧
When dealing with How to Make a Successful Water Leak Insurance Claim, following the right steps can significantly impact the success of your claim. Here are some essential tips:
- Contact Your Insurance Company Quickly:
- Promptly report the water damage to your insurer. Most policies have a specific timeframe for reporting claims. Failing to report it promptly may result in denial of coverage.
- Gather necessary information, including policy details and documentation of the damage, before contacting your insurer.
- Document Damage With Photos and Videos:
- Capture clear, high-quality images of all water-damaged areas. Include affected personal property like furniture, electronics, and valuables.
- Create a list of damaged items, noting their original value and keeping receipts if available. This information is crucial for your insurance company during the claims process.
- Mitigate Further Damage:
- While waiting for help, take steps to prevent additional damage:
- Shut off water sources causing the damage.
- Remove standing water (if safe) using buckets or towels.
- Consider professional restoration services for extensive damage assessment.
- While waiting for help, take steps to prevent additional damage:
Remember, acting swiftly and documenting thoroughly can increase your chances of a successful water damage insurance claim. 🏠💧
What is the average cost of water damage repair?
The average cost of water damage repair can vary based on several factors, including the extent of damage, location, and the type of water involved. Here are some estimates:
- Overall Average:
- On average, repairing water damage costs between $1,300 and $5,600.
- This includes both minor repairs (such as fixing a leaky faucet) and major restoration work.
- Cost by Category of Water Damage:
- Water damage is categorized into three types:
- Category 1 (Clean Water): Damage from clean water (e.g., leaky faucets) typically costs around $3 to $4 per square foot for repair.
- Category 2 (Gray Water): Water containing some contaminants (e.g., washing machine overflow) may cost more due to additional cleaning and disinfection requirements.
- Category 3 (Black Water): Highly contaminated water (e.g., sewage backup) requires extensive cleanup and can be the most expensive to repair.
- Water damage is categorized into three types:
- Additional Factors:
- The specific location of the damage (e.g., basement, ceiling, walls) affects costs.
- Labor costs, materials, and any necessary structural repairs contribute to the overall expense.
- Geographic location and local labor rates play a role.
- Insurance Coverage: How to make a successful water leak insurance claim
- Home insurance may cover water damage repairs, but it depends on your policy and the cause of the damage.
- Consult your insurer to understand coverage and deductible amounts.
Remember that timely repairs are crucial to prevent further damage and mold growth. If you experience water damage, consider professional assistance for effective restoration. 🏠💧
What are some common causes of water damage?
Water damage can occur due to various reasons. Let’s explore some of the common causes of water damage and ways to prevent them:
- Leaks in the Plumbing Systems:
- Rust, corrosion, and weakened pipe joints can lead to water leaks.
- High water pressure, extreme temperatures, and broken connectors are also culprits.
- Regularly inspect your plumbing system and promptly address any leaks to prevent structural damage.
- Clogged Gutters:
- Leaves, debris, and sludge often clog roof gutters.
- When gutters are blocked, water pools and overflows near your home’s structures, causing damage.
- Regularly clean gutters to avoid water accumulation and potential mold growth.
- Faulty Appliances:
- Aging water heaters, washing machines, and other appliances can malfunction.
- Poor water connections and hose issues contribute to water damage.
- Regularly maintain and inspect appliances to prevent leaks and flooding.
- Blocked Toilets:
- Toilet blockages or malfunctions can cause water overflow.
- Address toilet issues promptly to avoid damage to floors and surrounding areas.
- Burst Pipes:
- Sudden pipe bursts due to freezing, corrosion, or excessive pressure can flood your home.
- Insulate pipes in cold weather and monitor water pressure to prevent bursts.
- Malfunctioning Air Conditioner:
- Faulty AC units can leak water, damaging walls, ceilings, and floors.
- Regularly service and maintain your air conditioner to prevent leaks.
- Septic Tank and Sewage Backup:
- Septic tank issues or sewage backups can lead to contaminated water damage.
- Proper septic system maintenance is crucial to prevent backups.
- Water Overflow:
- Overflow from appliances, bathtubs, or sinks can cause damage.
- Be cautious and turn off water sources when necessary.
- Adverse Weather Conditions:
- Heavy rain, storms, and flooding can infiltrate your home.
- Ensure proper drainage and consider flood insurance if you live in a high-risk area.
Remember, proactive measures and timely repairs can significantly reduce the risk of water damage in your home. 🏠💧
Can I file a claim for mold caused by water damage?
Yes, you can file a claim for mold caused by water damage. However, the process can be complex, and it’s essential to understand your insurance policy and follow the right steps:
- Assess the Situation:
- Determine if the mold is a result of a covered water damage event (such as a burst pipe or a leaking roof). If it is, proceed with the claim.
- Take photos or videos of the mold growth and the affected areas. Document the extent of the damage.
- Review Your Policy:
- Check your homeowner’s insurance policy to see if mold remediation is covered. Some policies include mold coverage, while others may exclude it.
- Look for any specific conditions or limitations related to mold claims.
- Contact Your Insurer:
- Notify your insurance company about the mold issue promptly. Provide details about the water damage incident that led to mold growth.
- Be prepared to answer questions about the timeline, cause, and extent of the water damage.
- Mitigate Further Damage:
- Take steps to prevent additional mold growth. This may include:
- Fixing the source of water intrusion (if it hasn’t been resolved already).
- Drying out affected areas.
- Hiring a professional mold remediation service.
- Keeping records of expenses related to mitigation efforts.
- Take steps to prevent additional mold growth. This may include:
- File the Claim:
- Submit a formal claim to your insurer. Include all relevant information, such as photos, documentation, and receipts.
- Be honest and accurate in your claim submission.
- Professional Assessment:
- Your insurer may send an adjuster or request an inspection by a mold specialist. Cooperate with this process.
- The assessment will determine the extent of the damage and the necessary remediation steps.
- Coverage Determination:
- Based on the assessment, your insurer will decide whether to cover the mold removal costs.
- If covered, they’ll provide instructions on how to proceed.
Remember that mold claims can be tricky, and coverage varies. Some policies may cover mold removal but not the underlying cause (e.g., fixing a leak). Consult your insurance agent or a legal professional if you have any doubts. 🏠💧🌿

What is the average cost of mold remediation?
The average cost of mold remediation can vary based on several factors, including the size of the affected area, the severity of the mold infestation, and the specific circumstances. Here are some estimates:
- Xactimate Estimate:
- According to Xactimate, a software estimating program used by mold removal specialists and insurance agents, the average cost is approximately $2.50 per square foot for mold removal.
- For a 1,000-square-foot home, this would translate to around $2,500 for whole-home mold removal.
- An averaged-sized 2,000-square-foot home might cost around $5,000, while a 5,000-square-foot home could cost approximately $12,500.
- Other Estimates:
- Different sources provide varying estimates. Some homeowners pay around $1,800 to $20,000 or more for professional mold remediation services.
- The actual cost depends on the specific circumstances of each case, including the extent of damage and the method used for removal.
- Factors Affecting Cost:
- The cost can be influenced by labor, materials, and additional services (such as containment and disposal).
- If there’s extensive structural damage or the need to relocate during remediation, the total cost could increase substantially.
Remember that these are average estimates, and your actual cost may differ based on your unique situation. It’s essential to consult with professionals and get accurate quotes for your specific mold remediation needs. 🏠🌿
Can I remove the mold myself?
Certainly! If you’re considering DIY mold removal, here are some essential steps to follow:
- Safety First:
- Protect yourself: Wear appropriate personal protective equipment (PPE), including gloves, goggles, and a mask.
- Ventilate the area: Open windows and use fans to improve air circulation.
- Assess the Situation:
- Determine the extent of the mold growth. If it covers a small area (less than 10 square feet), you might be able to handle it yourself.
- If the mold is extensive or in hard-to-reach places, consider professional help.
- Gather Supplies:
- You’ll need:
- Soap and water: For cleaning non-porous surfaces.
- Baking soda: Effective for scrubbing and deodorizing.
- Hydrogen peroxide: Kills mold on porous surfaces.
- Vinegar: Effective against some types of mold.
- Scrub brushes: To remove mold from surfaces.
- Plastic sheeting and tape: To create containment barriers.
- Trash bags: For disposal.
- Dehumidifier: To reduce moisture.
- Fans: For ventilation.
- You’ll need:
- Containment:
- Isolate the affected area using plastic sheeting and tape to prevent mold spores from spreading.
- Seal off vents and doors.
- Clean the Mold:
- Scrub non-porous surfaces with soap and water.
- For porous materials (like drywall), use a mixture of water and hydrogen peroxide or vinegar.
- Avoid using bleach, as it doesn’t prevent mold regrowth.
- Dry the Area:
- Use fans and a dehumidifier to reduce moisture.
- Fix any leaks or water sources contributing to mold growth.
- Monitor and Prevent:
- Keep an eye on the area for signs of recurrence.
- Address any underlying issues (e.g., leaks, poor ventilation).
Important Notes:
- Professional Help: If the mold covers a large area, is toxic (black mold), or is in your HVAC system, consult a professional.
- Health Risks: Mold exposure can be harmful. If you experience symptoms like coughing, sneezing, or skin irritation, seek medical advice.
Remember, safety and thoroughness are crucial. If you’re unsure or concerned, consult a professional mold remediation specialist. 🏠🌿
How can I test for mold in my home?
Detecting mold in your home is essential for maintaining a healthy living environment. Here are some methods to test for mold:
- Visual Inspection:
- Look for visible signs: Check walls, ceilings, and floors for patchy, fuzzy growth. Mold can appear in various colors, including black, green, white, and orange.
- Musty odor: If you notice an earthy or musty smell, it could indicate hidden mold even if it’s not immediately visible.
- Problem areas: Focus on bathrooms, basements, and crawl spaces—places with high humidity levels.
- Surface Tests:
- Tape-strip tests: Dip a swab in diluted bleach (1 part bleach, 16 parts water) and dab it on the wall. If the spot lightens or keeps returning after cleaning, it’s likely mold.
- Petri dish test: Use a petri dish coated with a medium that encourages mold growth. Place it where mold is suspected or swab a sample directly onto it. Wait 48 hours for spores to accumulate, then seal the dish and store it in a dark place.
- Air Quality Tests:
- Air pump kits: Purchase a viable mold detection kit that collects air samples. Some kits can be mailed to professional labs for extensive analysis.
- Professional consultation: Consider consulting a professional for accurate results and interpretation.
Recommended Mold Test Kits:
- Best Overall: Mold Inspection Network DIY Mold Test Kit includes tape-strip tests and sample containers for lab testing.
- Runner-Up: Seeml Labs DIY Mold Test Kit provides comprehensive testing options.
- Budget-Friendly: Mold Armor Do It Yourself Mold Test Kit offers a cost-effective solution.
Remember that mold can impact health, so timely detection and remediation are crucial. 🏠🌿
What are some common types of mold?
Mold is a common issue in homes, and understanding the different types can help you address it effectively. Here are some common types of mold you might encounter:

- Chaetomium:
- Type: Allergenic.
- Where It’s Found: Water-damaged homes.
- Description: Often starts as a fuzzy white growth and can darken over time. It’s commonly found in houses damaged by flooding or significant water leaks.
- Stachybotrys (Black Mold):
- Type: Toxigenic.
- Where It’s Found: Damp areas, including ventilation systems.
- Description: Associated with poor indoor air quality due to excess moisture. It’s dangerous and should be removed by licensed remediation specialists.
- Trichoderma:
- Type: Toxigenic.
- Where It’s Found: Damp soil.
- Description: Common in soils worldwide. Trichoderma can grow anywhere in the home with organic matter and sufficient moisture. It produces mycotoxins under certain conditions.
- Alternaria:
- Type: Common.
- Where It’s Found: Indoors and outdoors.
- Description: Often found in damp areas, such as showers and basements. It can trigger allergies and asthma.
- Penicillium:
- Type: Common.
- Where It’s Found: Indoors, especially on water-damaged materials.
- Description: Known for its blue or green appearance. Some species produce mycotoxins.
- Aspergillus:
- Type: Common.
- Where It’s Found: Indoors and outdoors.
- Description: Various species exist, and they can cause respiratory issues. Aspergillus can grow on damp walls, insulation, and HVAC systems.
Remember to address mold promptly to maintain a healthy living environment! 🏠🌿
What are some health risks associated with mold exposure?
Mold exposure can lead to various health issues. Here are some common symptoms and risks:
- Allergic Reactions:
- Stuffy nose, sore throat, coughing, or wheezing.
- Burning eyes or skin rash.
- People with asthma or mold allergies may experience severe reactions.
- Mycotoxins and Inflammation:
- Cognitive difficulties: Brain fog, poor memory, and anxiety.
- Pain: Abdominal pain and muscle pain (similar to fibromyalgia).
- Unexplained weight gain or weight loss.
- Numbness and tingling in extremities.
- Metallic taste in the mouth.
- Vertigo or dizziness.
- Tinnitus (ringing in the ears).
- Digestive issues: Limited food tolerance and persistent bloating.
- Fatigue interfering with daily activities.
- Mood changes.
- Excessive thirst and dehydration, even bed-wetting in children.
- Symptoms resembling hormone imbalances (hair loss, rashes).
Remember that mold-related health problems are real, and timely action is crucial for your well-being. 🏠🌿
Can I file a claim for mold caused by water damage?
Yes, you can file a claim for mold caused by water damage. However, the process can be complex, and it’s essential to understand your insurance policy and follow the right steps:
- Assess the Situation:
- Determine if the mold is a result of a covered water damage event (such as a burst pipe or a leaking roof). If it is, proceed with the claim.
- Take photos or videos of the mold growth and the affected areas. Document the extent of the damage.
- Review Your Policy:
- Check your homeowner’s insurance policy to see if mold remediation is covered. Some policies include mold coverage, while others may exclude it.
- Look for any specific conditions or limitations related to mold claims.
- Contact Your Insurer:
- Notify your insurance company about the mold issue promptly. Provide details about the water damage incident that led to mold growth.
- Be prepared to answer questions about the timeline, cause, and extent of the water damage.
- Mitigate Further Damage:
- Take steps to prevent additional mold growth. This may include:
- Fixing the source of water intrusion (if it hasn’t been resolved already).
- Drying out affected areas.
- Hiring a professional mold remediation service.
- Keeping records of expenses related to mitigation efforts.
- Take steps to prevent additional mold growth. This may include:
- File the Claim:
- Submit a formal claim to your insurer. Include all relevant information, such as photos, documentation, and receipts.
- Be honest and accurate in your claim submission.
- Professional Assessment:
- Your insurer may send an adjuster or request an inspection by a mold specialist. Cooperate with this process.
- The assessment will determine the extent of the damage and the necessary remediation steps.
- Coverage Determination:
- Based on the assessment, your insurer will decide whether to cover the mold removal costs.
- If covered, they’ll provide instructions on how to proceed.
Remember that mold claims can be tricky, and coverage varies. Some policies may cover mold removal but not the underlying cause (e.g., fixing a leak). Consult your insurance agent or a legal professional if you have any doubts. 🏠💧🌿
FAQs: Here are some frequently asked questions related to How to Make a Successful Water Leak Insurance Claim:
How to Make a Successful Water Leak Insurance Claim?
Prompt Reporting: Report the leak to your insurer as soon as possible. Quick action is crucial.
Document Everything: Take photos of the initial and resulting damage. Document affected household items.
Control the Leak: Identify the source and stop the water flow. Prevent further damage.
Work with Licensed Contractors: Seek professional help for repairs to avoid claim denial.
What causes water damage to be covered or not?
Covered Causes: Leaks due to burst pipes, appliance malfunctions, or sudden accidents.
Excluded Causes: Flooding (requires separate flood insurance), negligence, and gradual wear and tear.
How do I start the claims process?
Contact Your Insurer: Notify them promptly about the water damage.
Provide Evidence: Photos, videos, and details of the incident.
Avoid Repairs: Wait for an adjuster to assess the situation before making extensive repairs.
What if I can’t find the leak source?
Consult Professionals: Contact a local plumbing company or experts in leak detection.
Leave Everything in Place: Don’t attempt repairs until an adjuster investigates.
Conclusion: How to Make a Successful Water Leak Insurance Claim
“Learn How to Make a Successful Water Leak Insurance Claim effectively. Assess the damage, understand your policy, document thoroughly, and promptly report the issue to your insurer. Mitigate further damage and communicate honestly. Quick action and proper documentation increase your chances of a successful claim.” 🏠💧
Disclaimer: How to Make a Successful Water Leak Insurance Claim
The information shared in my previous responses is for general guidance only. Insurance policies and claims processes can vary significantly based on individual circumstances, policy terms, and local regulations. Always consult with a licensed insurance professional or legal advisor for personalized advice related to your specific situation. 🏠💧🌿